Handy tips
Need help with the install? Unsure when to water? Forgotten how to reset your tap timer. Let Pope take the irritation out of irrigation with these useful tips and tricks on anything irrigation.
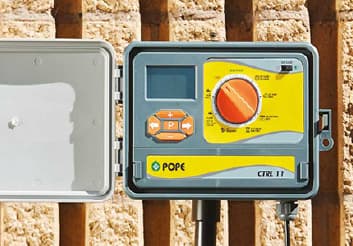
Water automation
- Can’t be mounted horizontal.
- Gear lock must be de-pressed when selecting time.
- keep the filter installed.
- Rain delay setting, delays program by 1 hour. Can use up to 12 times (12 total delay).
- Needs to be set at the time you want it to come on. Eg: If required to come on at 6am, user need to set frequency dial at 6am.
- Changing Run Time will not alter the start time.
- Battery will flash at 5 sec intervals to show battery is healthy, 1 sec intervals means change battery.
- A screwdriver is required to remove battery compartment.
- To clear programming, hold the Change button for 7 seconds.
- Tap icon displays when timer should be watering.
- Depicts battery level indicator.
- Takes AA batteries.
- Watering days apply to all programs to conform with local water restriction guidelines.
- Programs will stack like a proper Irrigation Controller.
- Eco Mode allows for soak in time during programs to avoid water run off.
- Preconfigured Manual mode is for 5 minutes per zone.
We suggest watering early in the morning during the summer months.
Night time watering and warm air can be a breeding ground for fungicides and pests.
For larger areas use a dual tap timer as this provides you flexibility and control for different zones of your garden or explore fully automated systems.
Solar panel generated tap timers are great for your holiday house or when you are unavailable to change your battery regularly. Check out at Pope’s Sun Boss solar tap timer.
Tap timers pair well with drip irrigation systems, eliminating the chore of hand watering.
Tap timers are recommended when you install a pressure reducer to your tap. This way you can control when you water and the right pressure to operate your drip system and conserve water.
Fully automation systems
When determining where to put your controller, there are a few things to keep in mind:
- It must be mounted in a weather proof area.
- It should be mounted close to a 240 volt power source.
- It should be installed at least 2 metres away from other electrical devices
(this will reduce any chance of electrical interference).
Each valve connects to the controller via two wires, known as the common and active wires.
To connect the valves to your controller, follow these three steps:
- Working from the solenoid valve end, select either of the two leads coming out of the solenoid coil and connect the active wire to it. Repeat this for all valves.
- Connect the remaining lead from each solenoid coil to the common wire.
- Loop the common wire from one coil to the next.
Connect the manifold to the off-take with PVC pipe. The pipe pressure rating must meet local regulations.
- Do not connect the manifold to your garden tap.
- Manifolds are not designed to be mounted vertically from garden taps.
Master valves are useful for isolating your irrigation system from your mains water system. It allows you turn off the system for maintenance (manual valve), or automate it as part of the system turn on procedure (solenoid valve).
Back flow is when water from your yard flows back through the water supply lines and into the water supply. This can be caused during system deactivation or when a pipe in the system is damaged. A back flow valve should be installed to prevent any waste water flowing back into the water supply.
Please contact your local council for more information on whether this is required for your installation.
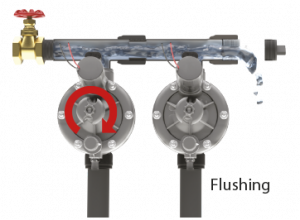
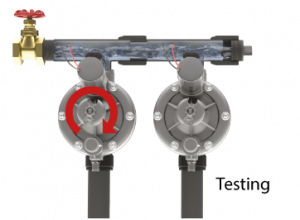
When the solenoid valves and manifolds are connected and the glue on the PVC pipe has set, test the system for leaks.
First, flush the manifold and PVC pipe of any debris by removing the screwed plug on the manifold.
Re-apply the pressure and check all fittings for leaks. This is best done before trenches are backfilled.
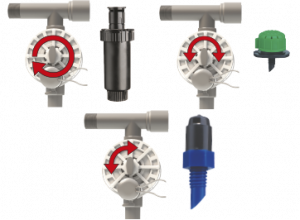
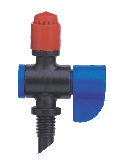
Where fitted, the flow control handle on the solenoid valve is used to adjust the pressure available to the watering device. To adjust operating pressure, firstly turn the flow control handle clockwise as far as it will go. At the controller, turn the valve on using the manual valve on feature. Turn the flow control handle counter clock-wise until the watering device is operating correctly.
Repeat this step for each valve fitted with flow control.
As an example, each of the below may require different flow settings.
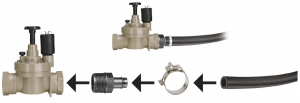
Lay poly pipe and connect sprinklers, sprays or drippers as per your plan. Use locking or
Loc-sure™ clamps on all barbed fittings.
Once the solenoid valve is installed, connect the director to the solenoid valve, then connect the poly pipe.
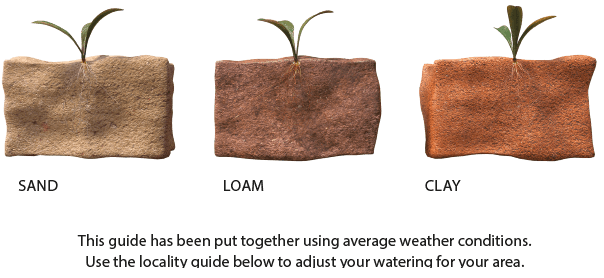
How much water does your soil hold?
Check your soil type to calculate how much water your soil will hold. This will help understand how often you should water.
Grab a hand full of soil and squeeze it gently with your fingers (don’t do this when the soil is very wet or very dry). Open your fist and gently poke at the soil.
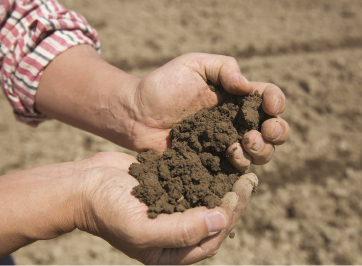
Sandy soil – If the soil falls apart completely you have sandy soil which allows water to run straight through and therefore plants don’t get enough water and dry out quickly.
Loam soil – If the soil gently breaks into small clumps, you have loam which is the ideal soil. It contains a mix of particles, allowing water to move more slowly through the soil.
Clay soil – If the soil gently breaks into small clumps, you have loam which is the ideal soil. It contains a mix of particles, allowing water to move more slowly through the soil.

Incorrect – Fast Water Emission Rate
Correct – Slow Water Emission Rate
Check the light
How many hours of direct sun does each area of your yard get? This will influence how often you need to water.
• 1 to 4 hours of sun or 3 to 6 hours of dappled sunlight means you have a shade garden.
• 4 to 6 hours of sun or 6 to 8 hours of dappled sunlight means you have partial shade.
• More than 6 hours of sun a day means you have a sun garden.
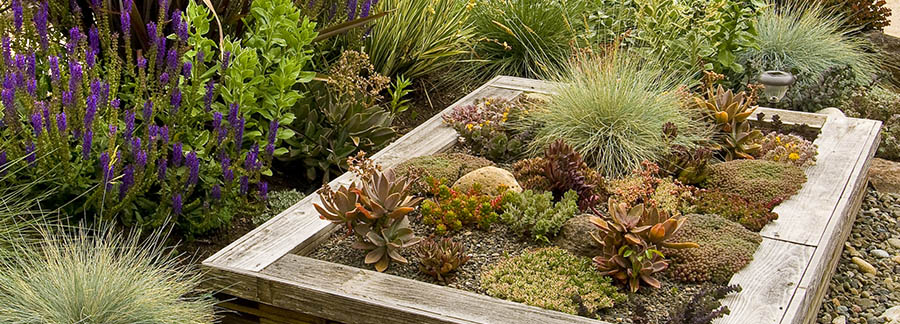
Check your compost level
No matter what type of soil you have, adding organic matter allows for the ideal flow of water through the soil. You can easily make your own at home. By using compost or mulch in your garden you can stop water loss through evaporation and also prevent soil erosion. Mulching can prevent up to 73% of soil evaporation loss whilst it also restricts weed growth.
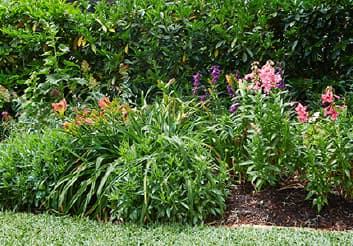
Check your plants and placement
Select plants and grass suited to your climate, the amount of light and soil type. Native plants are the best choices. Incorporate “hydrozones” within your landscape. Hydrozones are areas where you can group plants with similar water requirements.
Check your garden is weed-free
Be on top of you weeding in the garden. Weeds compete with the plants in your garden for water. Be water-wise and don’t water the weeds!
Getting the amount of water right is just a combination of knowing what type of soil you have, how long you need to water, and how often you need to water. Different soils hold different levels of water.

Please note: water distribution rates vary from sprinkler to sprinkler and from manufacturer to manufacturer. This guide has been precisely calculated for pope sprinklers, jets and drippers. Using these guidelines for products not listed may result in under or overwatering.
| Use this table as a guide for watering your garden |
|---|
| Sand |
| Clay |
| Loam |
| Pop-ups | ||||||
|---|---|---|---|---|---|---|
| Professional | Very Hot > 35 | Hot 30 - 35 | Very Warm 25 - 30 | Warm 20 - 25 | Mild 15 - 20 | Rain - Cold |
 |
 |
 |
 |
 |
 |
 |
| 5 - 10 mins | Every day | Every day | Every 2nd day | Every 3rd day | Every 4th day | X |
| 10 - 20 mins | Every 3rd day | Every 3rd day | Every 4th day | Every 5th day | Every 6th day | X |
| 20 - 30 mins | Every 3rd day | Every 4th day | Every 5th day | Every 6th day | Every 7th day | X |
| Use this table as a guide for watering your garden |
|---|
| Seedlings |
| Small Established Shrubs |
| Larger Shrubs |
| Flower Beds |
| Vegetables |
| Trees |
| Spray Jet | Microjets™ | Veri-flow® SprayJet |
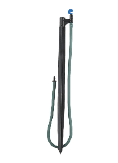
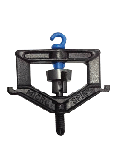
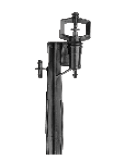
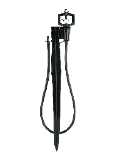
Eze-Jet | Mini Spinner | Mini Sprinkler | Waterbird VI Sprinkler on Stake |
|---|---|---|---|---|---|---|
 |
 |
 |
 |
 |
 |
 |
| 2 - 5 mins | 5 - 10 mins | 1 - 10 mins | 5 mins | 2 - 5 mins | 5 - 10 mins | 5 mins |
| 5 mins | 10 mins | 5 - 10 mins | 10 mins | 5 mins | 10 mins | 10 mins |
| 10 mins | 15 mins | 10 - 15 mins | 15 mins | 10 mins | 15 mins | 15 mins |
| 5 mins | 10 mins | 5 - 10 mins | 10 mins | 5 mins | 10 mins | 10 mins |
| 5 mins | 10 mins | 5 - 10 mins | 10 mins | 5 mins | 10 mins | 10 mins |
| 10 - 15 mins | 15 - 20 mins | 10 - 20 mins | 15 - 20 mins | 10 mins | 15 - 20 mins | 10 - 20 mins |
| Use this table as a guide for watering your garden |
|---|
| Flow Rate Per Emitter |
| Seedlings |
| Small Established Shrubs |
| Larger Shrubs |
| Flower Beds |
| Vegetables |
| Trees |
| Drippers | Drippers | Drippers | Veri-Flow Dripper |
Vari-Flow Trickler |
4mm Drip Eze | 13mm Drip Eze | 4mm Water Weeper® |
12mm Water Weeper® |
|---|---|---|---|---|---|---|---|---|
 |
|
|
 |
 |
 |
 |
|
|
| 2 lph | 4 lph | 8 lph | 0 - 60 lph | 0 - 30 lph | 1 lph | 2 lph | 12 lph per 10m | 240 lph per 15m |
| 10 mins | 5 mins | 3 mins | up to 5 mins | up to 5 mins | 20 mins | 10 mins | 10 mins | 5 mins |
| 30 mins | 15 mins | 10 mins | up to 15 mins | up to 15 mins | 1 hr | 30 mins | 30 mins | 15 mins |
| 45 mins | 25 mins | 15 mins | up to 25 mins | up to 25 mins | 90 mins | 45 mins | 45 mins | 25 mins |
| 30 mins | 15 mins | 10 mins | up to 15 mins | up to 15 mins | 1 hr | 30 mins | 30 mins | 15 mins |
| 30 mins | 15 mins | 10 mins | up to 15 mins | up to 15 mins | 1 hr | 30 mins | 30 mins | 15 mins |
| 1 hr | 30 mins | 15 mins | up to 30 mins | up to 30 mins | not suitable | 1 hr | 1 hr | 30 mins |
Drip irrigation
Sandy soil and potting mix have very fast drainage. This means you should use drippers with lower emission rates so the water seeps more slowly into the soil and water can be absorbed by the root zone, rather than bypassing the roots.
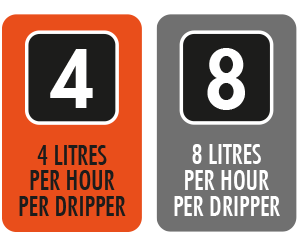
Established plants generally require more water than smaller or younger plants and they require it less frequently. Often, a good long soak is recommended. Consider using higher flow rate products such as 4 or 8 litres per hour drippers and ensure coverage is around the root areas of the trunk.

Where to place drippers
Drippers should be placed almost in line with the width of the tree.
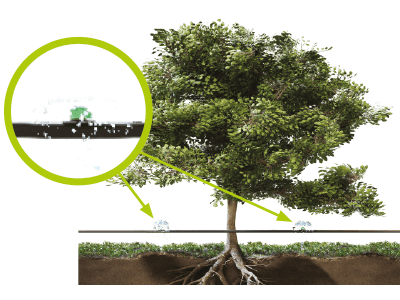
Loop around trees
Drippers should be placed evenly around the tree.

Use a punch to pierce holes in 13mm poly pipe.
For hanging baskets, use 4mm poly pipe and a 4mm adaptor to apply water direct to basket.
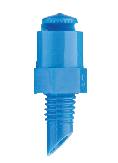
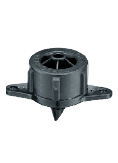
Using a pressure reducer lowers the available pressure from your garden tap to suitable level for drip irrigation.
Using a pressure reducer lowers the available pressure from your garden tap to suitable level for drip irrigation.
Use a repair plug if fittings need to be removed or repaired.
As we all know, water will flow down hill. This also true for water inside an irrigation system. If you install your drip tube on a hill, then the water will build up pressure at the bottom of the system, causing the downhill plants to get more water than those at the top. Fix this by installing PC or ‘pressure compensating’ products which will automatically compensate for uneven slopes.
Always use a filter, to prevent particles from blocking drippers and clean out your filter regularly.
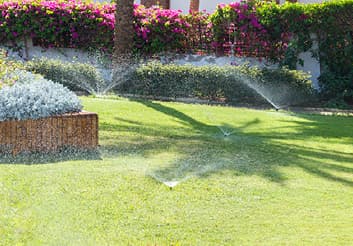
Pop-ups
- It’s important to consider the varieties and length of your lawn, as this will dictate the height of the preferred pop-up.
- You’ll need to ensure the pop-up is best suited to your flow consumption, which can be determined after you have completed your flow rate bucket test.
- Mapping the area to be watered to establish which spray pattern and arc will assist in selecting the right pop-up system.
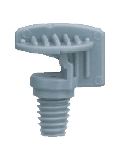
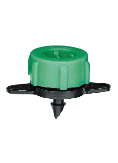
Adjusting spray
Use a screwdriver to adjust flow.
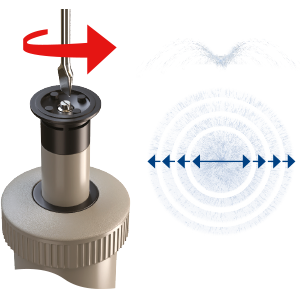
To reduce the throw, turn the screw to the right.
To increase, turn the screw to the left.
To adjust the arc, simply twist the nozzle.
Your irrigation system needs to be cleaned after your initial installation and also occasionally to remove dirt and debris.
The below explains how to disassemble a Precision pop-up without removing it from the system.
Other pop-ups may have the components arranged in a different way.
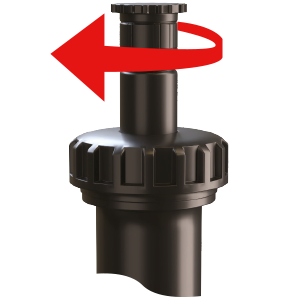
Step 1 – Unscrew the pop-ups cap.
Step 2 – Pull up the riser by gripping the wiper seal.
Step 3 – Hold the wiper seal down and unscrew the nozzle. Be careful not to let the spring go.
Step 4 – Remove the filter, wiper seal, spring and ratchet ring.
Step 5 – Clean all debris and grit from all parts and re-assemble.
Step 6 – Flush the system until the water runs clear.
Step 7 – Re-assemble all parts.
No, it is possible to install an irrigation system without a timer, but the benefits of having one will be greater as part of your watering system.
- Clean the sprinkler head and the plastic screen basket so it is not clogged with dirt or other debris.
- Check your water pressure to make sure it is not too low. Make sure that the valves on your backflow device are fully open. You may need to separate the system into zones to make sure each pop-up is getting the required pressure and flow.
- Check for any leaks in the water line which can cause low water pressure and keep water from flowing to the sprinkler head.
- One of the most common reason is a broken sprinkler head, if it is cracked or has broken pieces it will need to be replaced. Consider using a sprinkler surround or sinking the sprinkler lower so your mower doesn’t hit the sprinkler head.
Yes, when installing sprinklers on slopes position heads closer together on the uphill side of the pattern because gravity will shorten the spray throw. Also, to prevent erosion and uneven watering uphill, align sprinkler heads perpendicular to the slope.
This depends on the flow rate you are able to achieve from your water source.
Calculate your flow rate using the bucket test, then reference the flow consumption of the pop-up sprinkler. E.g. If you have a 45lpm flow rate, you can run 7.5 half circle professional sprinklers as they use 6 lpm (45 / 6 = 7.5).
- Trim back grass or prune vegetation growing around the pop-up heads.
- Clean the mesh filter monthly by removing the filter and rinsing it thoroughly.
- At least once a year take apart, clean, inspect and replace any damaged parts.